John and I want to take this opportunity to wish all of you a bunch of very wonderful holidays during the next two months. I've talked to a lot of you lately and you've said that the weather is turning. That's what gives us the clue that we're heading for the wonderful holiday season.
I love it when the leaves start to turn. When we have dark, cloudy days the leaves look like they are glowing, whether they are on the trees or already lying on the ground.
Remember that this is, also, the very best time for us to all share our products to help people handle giving a personally made holiday present. Something from the heart is the best gift of all.
Be sure to check it out. The icon is right under the header when you bring up the home page for Gingerscameo.com. All you have to do is hit it and a menu will come up so you can change the whole web site over to the language that you're used to. Go down where it says translate a web page - my web page is listed - then use the drop down arrow to find the language you need - then hit translate. I was really geeked when Lori (my Girl Friday) told me about it. She showed it to Razz (the Web Master) and he put it in. It's a free program so it was a hit with all of us. I hope you all have fun with it. I have.
Those of you that were at the Spring Workshop heard my daughter Mysti talk about the paints and how they go together and which ones we need to add. Well, here are some that she said we needed.
First - 106 - Coral, Yes, we have got it back in the Line. Coral is a color that I wanted to get back in right after I bought the Company - but John and Mysti couldn't get the formula to come out quite right. This time - after working with the colorants for the last few years - they went down and came up with it right off the bat. This time they knew more how all the parts and pieces worked together and they could make them do what they wanted them to do.
Coral can be used with our oranges, reds, browns and even a couple of our yellows.
Next comes 180 - Blue Ice, this is a new blue. It's a different blue than any we had before. Our other blue line has just a touch of green in it - this blue line shows no green at all. I think you will really like it. This is that "cold color" that Mysti said we needed.
Then there is 193 - Light Sage, this is a lighter tone of Sage and one that we needed to fill out that set of colors.
Now you need a little darker color to go with the new Blue Ice and this is it - 194 - Powder Blue. We got a new blue colorant and didn't realize how different it was from the one we had been using. John needed to mix up some 124 - Light Blue and he used the new blue colorant instead of the old blue colorant. Wow!! It really hit me in the eye. It was gorgeous! I told him to save it and we would put it in the line at a later time. This is that mistake. It's a mistake no longer - it is now a very wonderful blue color in the Paint Line.
For your shadow color using 180 - Blue Ice as your highlight and 194 - Powder Blue as your middle color - you can use 126 - Navy for your blue shadows.
This line of blues will go with the greens just like the old line of blues do.
I am using this opportunity to bring back some of the monthly colors that we had for a couple of years. One of those colors was called Desert Camo. It was a much colder brown tone than any that we had in the line - but I couldn't chart with it because it was just a monthly color. It was a mistake. John and Mysti went over what they did when they made that mistake and came up with 195 - Desert Sand. It is so close to the other one that most of you won't know the difference. This color can be used with all of our present browns, of course, and with the bright yellows (102 & 199). Actually, when you see the directions for some of the new quilt blocks for November and December, you will notice that I used it a couple of different places. It shades well with 198 - Ivory, too.
196 - Terracotta, this is a color that came out as one of the last monthly paints. It was such a good shading color - and I couldn't use it to chart with - because it was a monthly color. If you look at the Flower Face Quilt blocks for November and December you will see what a wonderful shadow color this is for 105 - Light Peach. It looks like a natural shadow when used on faces. This one can, also, be used with browns. It's really nice as a highlight with 168 - Cocoa or 114 - Brown. These two browns have a red tone to them so the reddish peachy color of the Terracotta goes with them just great. That's it for this time. In January we will come out with 12 new Sparkle Paints. That should set that Line up for you Sparklers. After that I don't know just when we will have more paints come out. I know there are still a few that are needed - but I don't have a timetable for them at this time. I hope you all enjoy the new colors as much as I do.
Now, the next great idea for your help and painting pleasure is a:
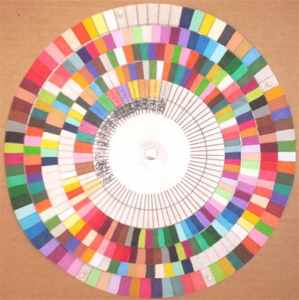
I've had a lot of folks tell me that we need one. I've had a few folks offer to set me up with one. I've had one group that sent me the complete directions on how to make one for Ginger's Cameo - that is Rachel Fry's group in Colorado. They sent me one of their finished color wheels, too.
Rachel's group did this wheel as a class project so everyone would have their very own color wheel to work with. On their color wheel, they put the old monthly paints and all the paints in the line. Of course, when they did their color wheels we didn't have as many paints in the Line as we do today.
There are a few blank spots left. These empty spots are for future paints that will be coming into the Line.
After I got mine done I pinned it to a piece of cardboard. Be sure to only pin the bottom, or biggest, wheel so that all the other wheels will still move. That will keep the wheels flat.
For the months of November and December 2006 the Monthly Special will be the Color Wheel Pak. This will include: (1)15" x 30" material; (3) transfers; (1) screw post for the center; (1)30" piece of plastic; (5) White map pins;
Now we need to talk about the Quilt Block Clubs for 2006. You can order the blocks for all of this year for $2.25 each. As of January 1st, 2007 they will only be available as a Quilt Pak for $25.00. This will give you one of each transfer and the directions for them and 12 blank quilt blocks. If you need to get some that you missed, I suggest you do it right away.
I hope putting the blocks for November and December out a little ahead of time will help those of you that are making the quilts for holiday gifts better able to get them done in time.
These monthly quilt blocks have gone over so well that I will be doing five (5) Clubs for next year.
There will be two (2) sets of baby quilts that will run six months each - one after the other.
Then there are two kids' quilts - My Pony and Dinosaurs - these will each run for 12 months. These can be done by kids -or for kids.
There will be the next set of 12 Flower Face blocks.
There will be a rose quilt. We haven't gotten the rose one all the way figured out yet - but I know you will like it.
What do you think? Is this a good idea? Do you like getting together at least once a month to paint and chat?
Did you do them by yourself this year? Try asking some friends if they would like to join you once a month or so next year. They would probably like that.
You could get some church ladies together to do the different quilts - then raffle them off at the end of the year.
How about one of the kids' clubs -they have to earn money, too, and they need something to do. They could make several of them (you know they are all going to look different) then raffle them or give them to some needy folks that will love them.
I'm sure you can think of a lot of ways to use the Quilt Clubs. Let me know your ideas on this.
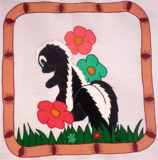
The Animal Quilt blocks are set up for outline and fill-in. These would be good for beginners. Children would love doing these colorful blocks. I have a couple schools that teach quilting classes to their students (elementary schools). These would be perfect to start a class at your school either during the daytime class times or in the after school latch-key times.
The Flower Face Quilt blocks give you a chance to teach shading and highlighting, how to use the Fiber Blenders to smooth the paints into the material and how to use them to smear the paint together in blending. These have you blending up to 4 or 5 different colors at a time. They, also, let you teach feather stroking as a technique to paint in hair and the fact that using lots of colors in hair actually make it look more real. This is an interesting class for everyone. 4-H groups could use this to make an entry-style project. You could get together with the leaders and teach them to teach, or you could run the classes yourself at their regular monthly meetings.
For those of you that are doing the Flower Face designs, I have a hint on their faces and make-up. Paint the entire face with the base color (105) and then do the lips. When you get done blending the colors of the lips together - use that same blending tool to blush a little of those colors on the cheeks. You don't want too much color and if you use your blending tool while the paint is still damp on it, it has just about the right amount of color to look like her blush. If you get too much on - just go back over it with the 105 to dull it down a little bit.
This is, also, when you put in the shadow color around her chin and on her nose.
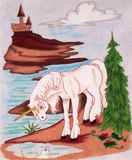
The Unicorn Quilt blocks take in even more techniques than the other two. The first thing that you teach is how to do a dry wash. You can use a brush or a small piece of rag. Almost everything in these pictures needs to be shadowed and highlighted. You have to use your Fiber Blenders all the time.
Wait for the base paint to dry before you use your Dual Point pen. These are used on the Flower Faces and the Unicorns. Do the base painting - then make sure the paint is dry before you use your Dual Point Pens. This keeps the Dual Point Pens from bleeding out on the perma press and keeps you from ruining your pen nib by getting wet paint on it.
It has been really interesting to see how these are going over. Every month more and more people are doing them. As they decide on doing another Set - they order all the previous Sets That they need to do the whole quilt. So every month I have people buying #1, #2, #3 and now they will be getting #4. It's very gratifying to see these go out in such large quantities.
I spend a lot of time just being amazed as I am packing orders to go out the door at how wonderful you all are.
I have gotten comments on the little hints that I put in each month. I'll keep trying to come up with new things to teach and things to teach about.
I have to say, again, how happy I am with the Fiber Blenders. As I sit down to paint up the newest transfers each month, I love using them because they are just the right size and shape to smooth and blend the paintings that I am doing.
When you smooth the first layer of paint into the material, you are giving yourself a nice even layer to put on your shading and highlights. Don't forget to do that - it makes everything much simpler.
AQ11 Animal Quilt Block Pak |
FFQ11 Flower Face Quilt Block Pak |
UQ11 Unicorn Quilt Block Pak |
AQ12 Animal Quilt Block Pak |
FFQ12 Flower Face Quilt Block Pak |
UQ12 Unicorn Quilt Block Pak |
So many people have been asking for Fabric Glue back - which I decided to put it back in the Line and see how it went. It took me so long to sell out of the two dozen that I got when I bought the Company that I figured there weren't that many people that used it. I have been told that the problem was that they had bought a lot of it when Orlando had their 'going out of business' sale. We'll see. I'm not going to put out a new Accessories page until January - so you will have to tell your customers that it's back. If it doesn't sell well in the next couple of months - I will probably drop it again. The number is C379 - Fabric Glue -$4.95. Your orders will tell me whether to keep it or just sell out what I've got and drop it.
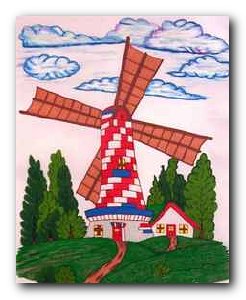
T4705 Windmill |
T4706 Sparkling Angel |
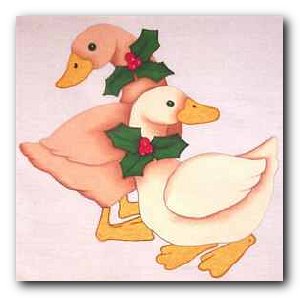
T4707 Holiday Geese |
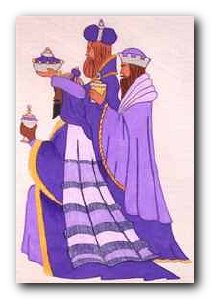
T4708 Wise Men |
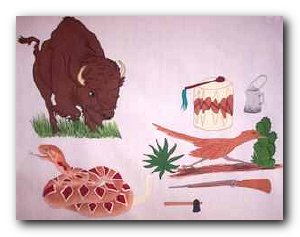
T4709 Plains Designs |
|
T4549 Easy Shade Flowers |
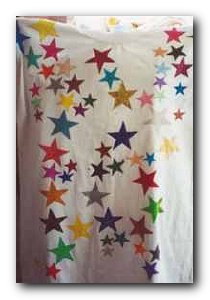
T4536 American Stars |
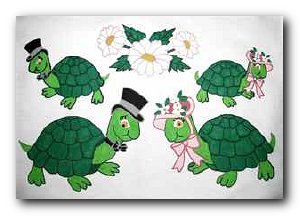
T4532 Turtles |
T4518 Melody of Flower |
T4514 Easy Shade Flowers |
T4477 Tigerlily |
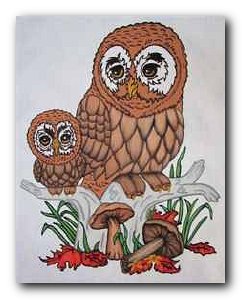
T4391 Owls |
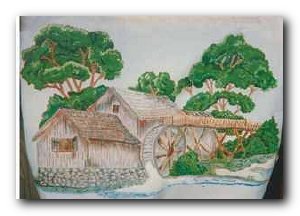
T4363 Watermill |
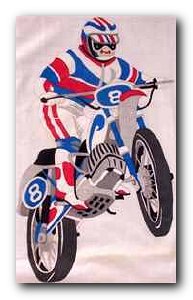
T4357 Motor Cross |
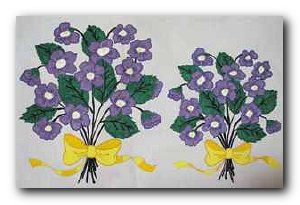
T4296 Violets |
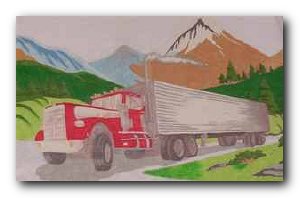
T4240 18 Wheeler |
|
Let's see if this is an answer to those of you that asked what was in our Perma Press. It's 65%Polyester and 35% Cotton. I hope that answers that question okay. I think that's what you all were asking for.
I hope to see a lot of you there.
Where: At the Ginger's Cameo facility in Manchester, MI
Time: Classes start at 9:00 AM (Continental Breakfast - homemade cinnamon rolls - 8:00 AM)
Door prize drawings on the hour will start at 9:00 AM and there will be one every hour after that for the full length of the Workshop.
Registration: $25.00 (includes some supplies)
Bring: A dish to pass (people decided that was the safest thing to do - since I don't cook.)
The schedule of classes for the Winter Workshop is:
I will have a Continental Breakfast starting at 8:00 AM. This will include the same home-made cinnamon rolls that we had at the Spring Workshop, juice, coffee, tea, milk and water.
Be sure to bring a full set of paints, scissors, a dish to pass, ideas to share and things to show.
I have some other things that will be for sale - old Cameo items like the loose glitter and other things that you might be interested in.
Be sure to bring extra money or your checkbook or your credit card - there will be a blow-out sale on sweatshirts - both colored and white. They will be $5.00 each or $20.00 for five (5). These are in all sizes, including children's.
There will, also, be colored t-shirts for sale at $2.00 each. (Lots of different sizes)
I have some other things that will be for sale - old Cameo items like the loose glitter and other things that you might be interested in.
When you're ironing off transfers, make sure that you don't iron off too many ahead. The transfer ink fades with time and you may have trouble seeing the transfer lines. If you do iron off a few ahead you should keep them covered up so the light doesn't get to them. This does not mean that if you iron a transfer on wrong that you can wait for it to fade away then put it back on. It does not fade all the way away, it just fades to the point that you can't see to paint it.
When you are painting a transfer that has two parts that are the same color right next to each other, try putting a line of a darker color between them to bring out the design. On the new T4689-Cave Nativity, Joseph's robes could use a streak of 111 Wine to delineate where one part stops and the other part ends. If you look on the picture around his shoulders you will see what I mean.
Sometimes, like on T4696 or T4486, you have two sections right next to each other that are charted 116-Black. If you leave a little line of unpainted material show between the sections, it will make them show up as different parts of the transfer. The other thing that you can do is to make a line of a lighter color between the two sections.
Most of the time any mistake that you make in this craft can be fixed: You can add shadows to cover up the fact that you got double lines when you ironed a transfer on - or you can add a little flower or leaf to cover up where you went out of the lines or got some paint in the wrong place. I know there are a lot of perfectionists out there - but believe me when I say that you should not throw away something just because you think you made a mistake. You can fix it and it will look fine. It may not look just like what you see in the transfer picture - but you just remember that 'artistic license' means that it is your painting and it will look different than anyone else's. This is a good thing. You don't want your painting to look just like everyone else's, you want to make it your own with your own ideas and personality.
Now get out there and have FUN painting!!!
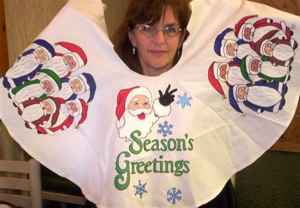
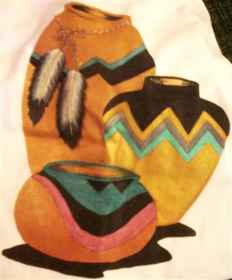
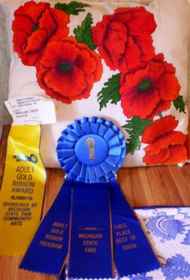
The only fair entries I got this year were from Jan Smyth. Thanks for sharing Jan.
Jan enters her items in the Fowlerville Fair and the Michigan State Fair.
|
|
|
|
Here's another suggestion. This one is from Halleen Fisk. If you are going to be doing a transfer on darker material - try going over the lines with your transfer Marker (C528) before you iron it on. That way the lines are darker and easier to see.
|
|
|
|
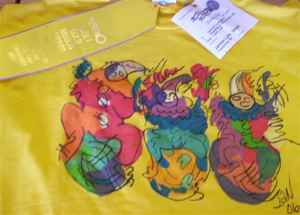
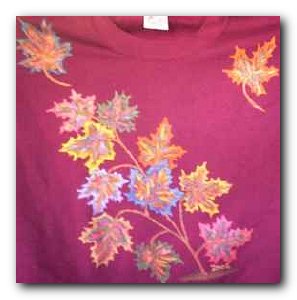
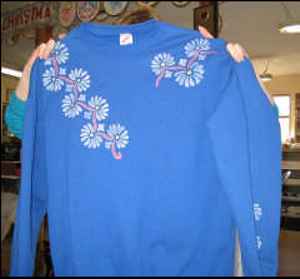
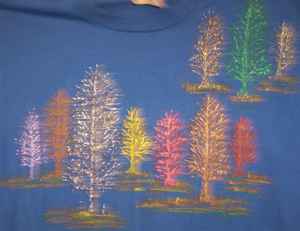
We would love to show our readers what you've done with Cameo Paints. Send us ginger@gingerscameo.com or webmaster@gingerscameo.com some of your pictures and be sure to tell us about them and yourself.
See some of our past reader submissions in the Gallery
Well, I guess that's all for this month. Keep that those suggestions coming. I need every one of them. See you at a meeting.
|
Copyright Gingers Cameo 2003 © |
Page Updated 10-31-2006 |